I am still not sure if this is a winner or a flop so I am putting it up on the blog and maybe I will tweak it later on. I am a penny pincher, but I like my kiddos to look cute. The other day I was at Target and saw these darling shirred tanks for girls. The price was $16 though and I wasn't about to spend that when I could come up with something on my own. This is what I did.

I went to Hobby Lobby and bought a T-shirt for $2, washed it and ironed it.

With my handy dandy acrylic guide, I measured up 6 inches from the hem and marked it with dressmakers chalk.

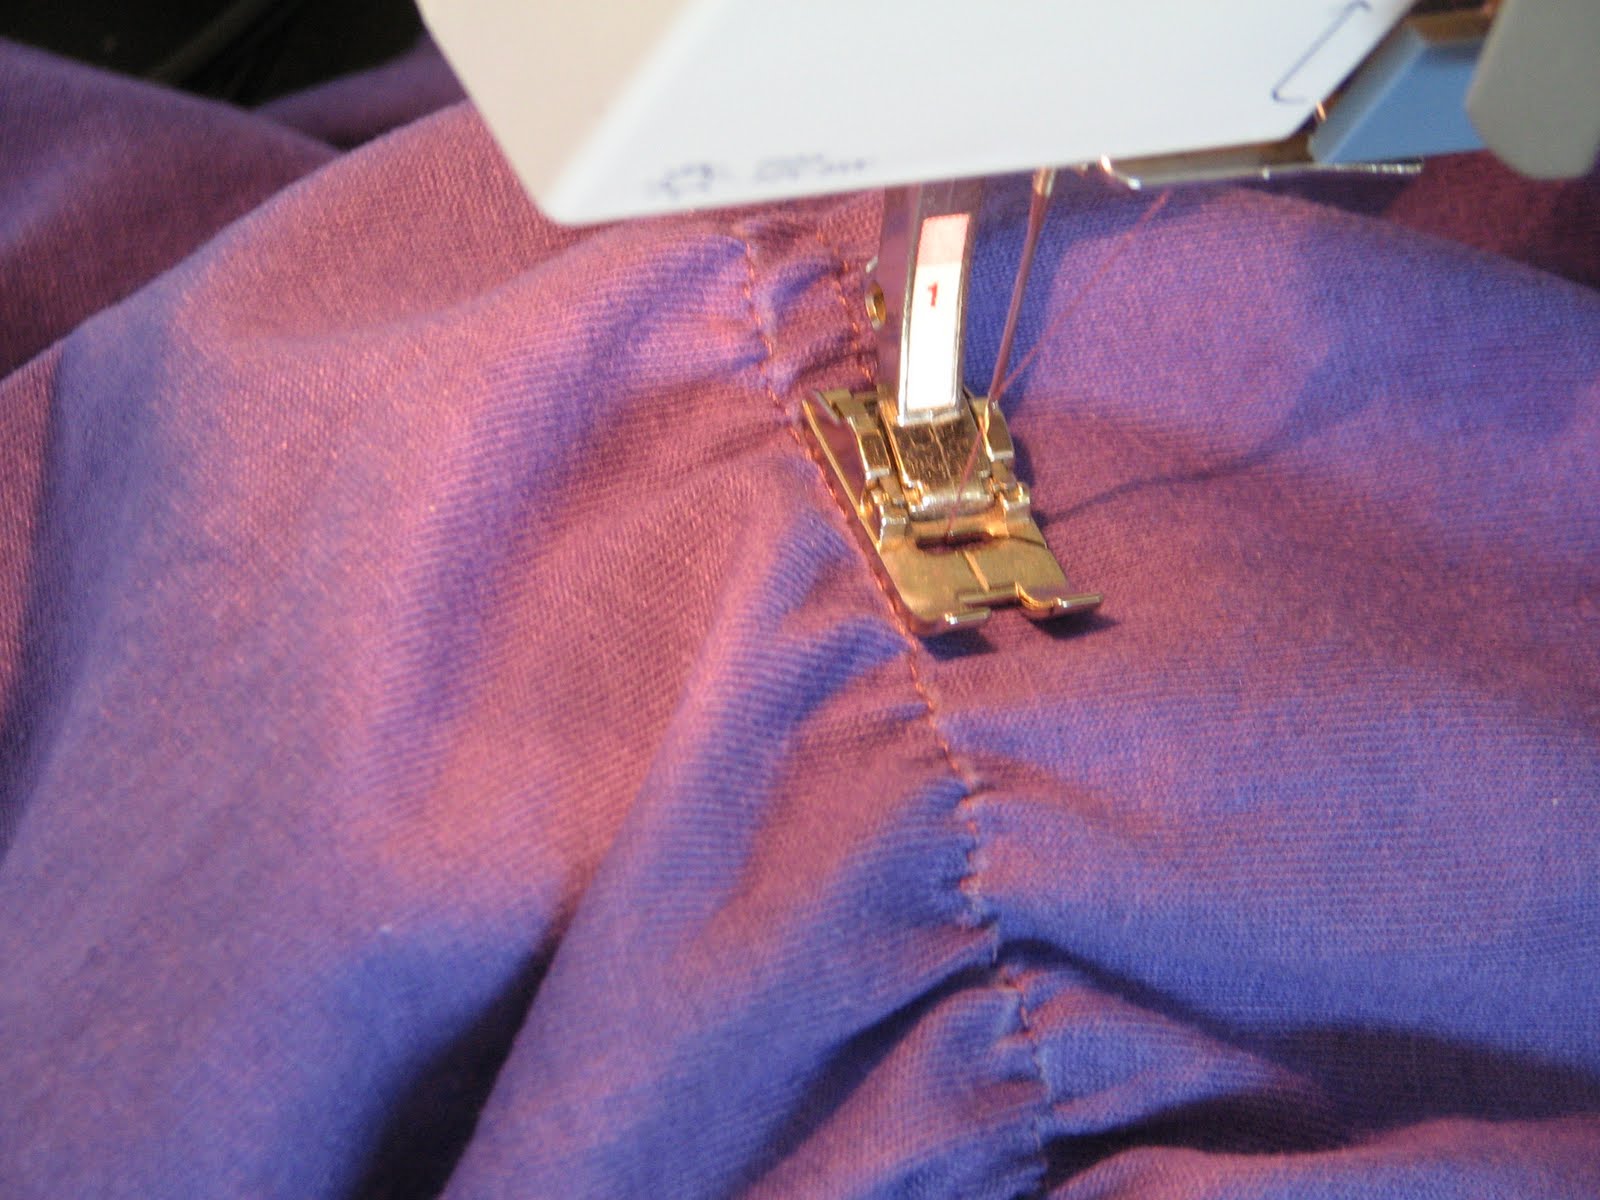
Now I didn't show this part but, you have to hand wind a bobbin with elastic thread and put regular thread through the upper threader. Sew along the chalk line that you have drawn. Make sure you back stitch over the first few stitches or all of the elastic threading will come out.

After you finish the first line of stitching and using your presser foot as a guide continue making lines around the t-shirt. I did about 8 and next time I would do about 6. Just do it so that the waist is the width that you want.

Next, fold your t-shirt in half (don't mind that my ironing board cover is disgusting!)

Place your acrylic marker as I have and make a line with dressmakers chalk. I placed the marker about 1/2 inch under the lowest part of the collar. Then, cut along the line that you have drawn.

Your shirt will end up looking like this.

I again, didn't take pictures of this, but starting about 1/2 to 1 inch from the top of the shirt, start sewing with the elastic thread in the bobbin and normal thread up top. I did about 3 lines and really liked the look.
I didn't like the look the look of the sleeves so I cut the sleeves about 1/2 inch from the armpit junction up to about an inch away the shirring up top.

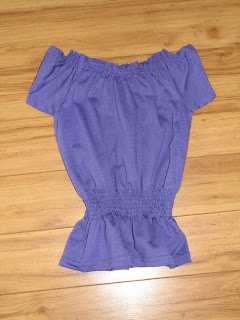
And this is what you end up with. A cute, flouncy tank top.