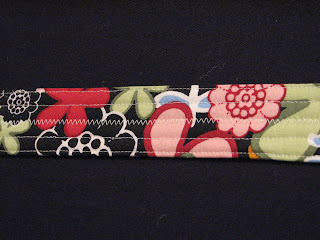
Making a Chic and Snazzy Belt
I am showcasing this tutorial as well as the buckle tutorial on Monday, May 10th on KSL Studio 5 at 11:00. Tune in to watch!
Tools Needed:
Fabric: For the length, measure around the hips of the person that the belt is intended for and add 8 inches. For the width, pick the width that you would like, double it and add one inch.
For this example, I cut the fabric across the fabric bias and ended up with 4” wide and 44” long. This will make a 1 ½” wide belt
(1 ½” doubled = 3inches plus one inch for seam allowance= 4” wide)
Fusible Fleece Interfacing: For this belt, I wanted a bit more stability so, we cut the interfacing 3” by 43”.
D Rings: They sell them in a 2 pack for less than a dollar at most Walmart or craft stores.
Additional Items: Spray Starch, Iron and Board, Sewing Machine.
Lets Get started!
1. Lay out your strip of fabric and iron it well. I use steam and spray starch. The starch makes the creases crisp and makes things look nicer.

2. On the wrong side of your fabric, iron on your piece of fusible interfacing.

3. Starting with the short ends, fold the fabric over the interfacing and iron into place.


4. Fold entire length of belt in half. Press it in place.

5. Staring on the short side at the middle crease, stitch the belt together as close to the edge as you can. Stitch all around of the edges.


6. Using your sewing machine foot as a guide, make two additional seams on the inside of first seams.

7. Make one more seam down the middle of the belt. This is a great chance to try out those fancy, decorative stitches on your machine!

8. Pull one end the belt through a set of the D-Rings about 1 ½” and stitch down. Go over the seam a couple of times to make it secure.

9. Now comes the fun part! There are so many fun ideas that you can use to make buckles for your belts. Find your favorite hair clip and slip it through the open loop below the D-Rings. Slip your new belt on and show it off.

Buckles are fun and easy to make. Check back for additional tutorials on making the buckles that go on these fabulous belts!


1 comment:
Great tutorial. Thanks for the wonderful instructions!
Post a Comment